pfSense and Suricata Firewall Lab
In this lab we go through how to configure pfSense as a next-generation firewall (NGFW) with DNSSEC validation and Suricata IDS/IPS, balancing Confidentiality, Integrity, and Availability.
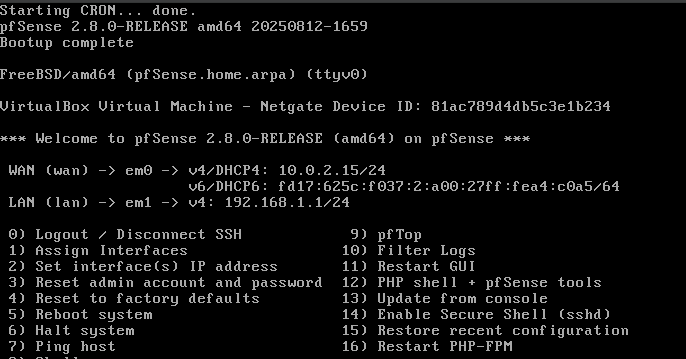
In this step, we establish pfSense as the backbone of our lab environment. The WAN is configured on a NAT network for external connectivity, while the LAN is placed on an internal network to safely isolate client devices. DHCP is enabled so LAN hosts can easily get IP addresses, ensuring availability. This setup ensures pfSense can enforce policies on real traffic, making the lab realistic. Without a stable baseline like this, the rest of the lab would fail, since no rules could be applied.
Framework Mapping:
- CIA: Availability
- NIST: SC-7 (Boundary Protection)
- ISO 27001: A.13.1.1 (Network Controls)
- MITRE ATT&CK: TA0007 (Discovery > Network Configuration)
Step 2: LAN Firewall Rules
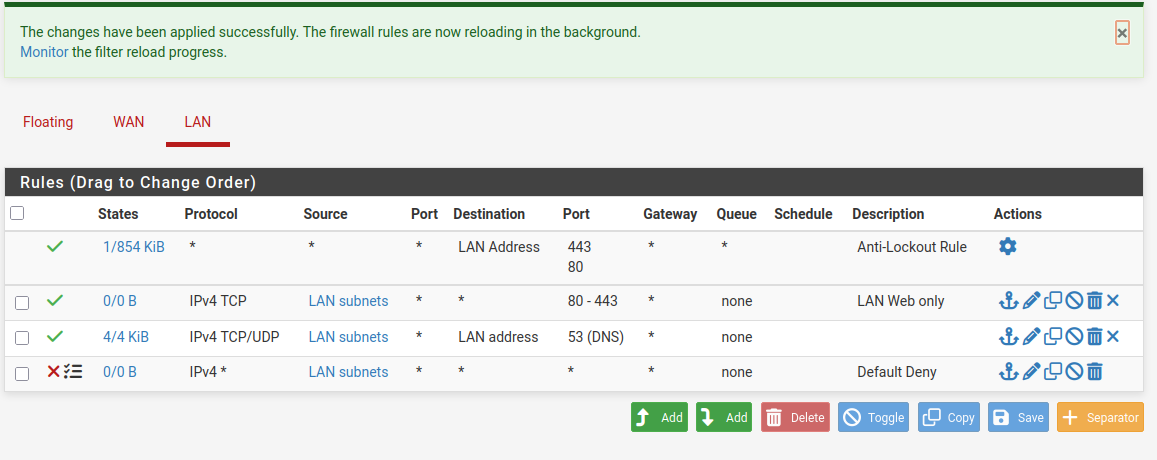
Here we restrict LAN devices to only DNS (53) and Web (80/443) traffic. This prevents unauthorized services like SMB, Telnet, or random ports from leaving the LAN. The principle of least privilege ensures clients can browse but cannot perform potentially dangerous actions. Real attackers often rely on open ports or hidden services to move laterally but by blocking them here stops that pathway. This also ensures that even if a LAN machine is compromised, its ability to communicate outward is heavily restricted.
Framework Mapping:
- CIA: Confidentiality, Availability
- NIST: AC-4 (Information Flow Enforcement)
- ISO 27001: A.13.1.3 (Segregation in Networks)
- MITRE ATT&CK: T1071 (Application Layer Protocol – Web/DNS)
Step 3: Trusted Admins Rule
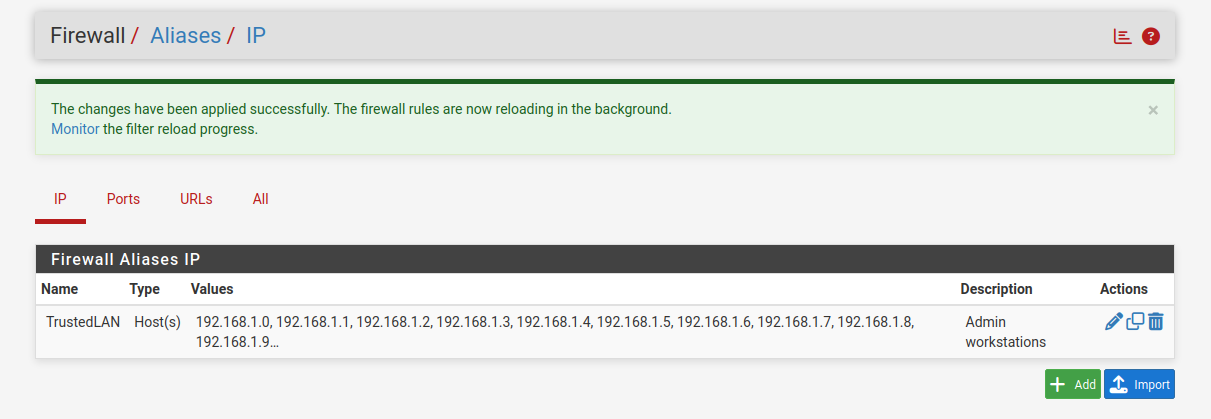
We createed a TrustedLAN alias for administrator devices only, then add a rule giving them elevated access. This ensures that only vetted machines can manage pfSense or bypass restrictions. In enterprises, this reflects a real-world control known as Privileged Access Workstations or PAWs. Attackers often target IT staff, so segmenting admin access is a key defense.
Framework Mapping:
- CIA: Integrity
- NIST: AC-6 (Least Privilege)
- ISO 27001: A.9.4.1 (System Access Control)
- MITRE ATT&CK: T1078 (Valid Accounts)
Step 4: Secure WebGUI
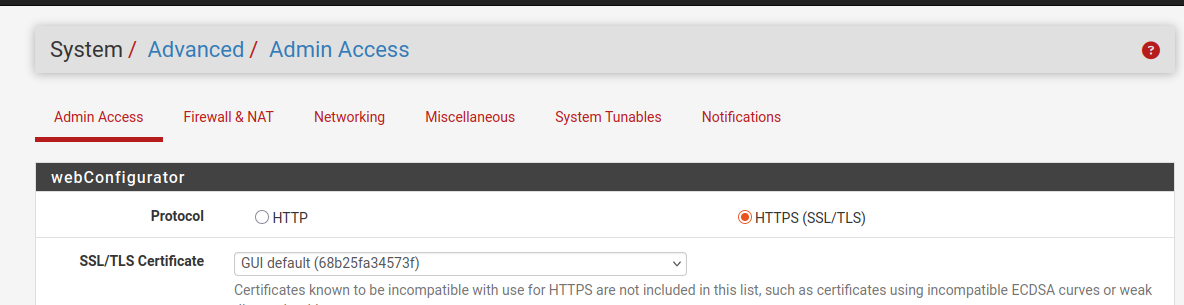
We then harden pfSense management by forcing HTTPS, changing the GUI port, and disabling the anti-lockout rule (since TrustedLAN is in place). This protects administrator credentials in transit, stopping credential theft from packet sniffing. Restricting access to the WebGUI further reduces the attack surface. Attackers often scan for open management portals, and leaving it unprotected can lead to full system compromise. With these changes, the firewall can only be managed securely by trusted admins.
Framework Mapping:
- CIA: Confidentiality, Integrity
- NIST: IA-2 (Identification and Authentication), SC-12 (Cryptographic Key Establishment)
- ISO 27001: A.9.2.3 (Management of Privileged Access Rights)
- MITRE ATT&CK: T1040 (Network Sniffing), T1078 (Valid Accounts)
Step 5: Harden DNS with DNSSEC

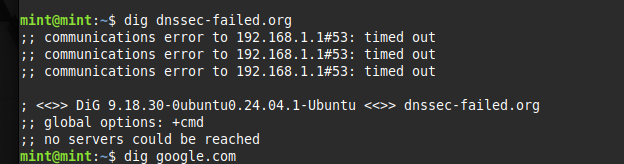
DNS is a prime target for attackers, whether through poisoning or redirection. Enabling DNSSEC validation on pfSense ensures DNS responses are cryptographically verified before reaching clients. This stops fake or manipulated DNS entries from being accepted. We verified it by testing dnssec-failed.org, which failed as expected, and google.com, which passed normally. By enforcing trusted resolution, we protect users from phishing and MITM attacks. This step is crucial for integrity because it guarantees the trustworthiness of name resolution.
Framework Mapping:
- CIA: Integrity
- NIST: SC-20 (Secure Name Resolution Service)
- ISO 27001: A.12.6.1 (Technical Vulnerability Management)
- MITRE ATT&CK: T1568 (DNS Manipulation)
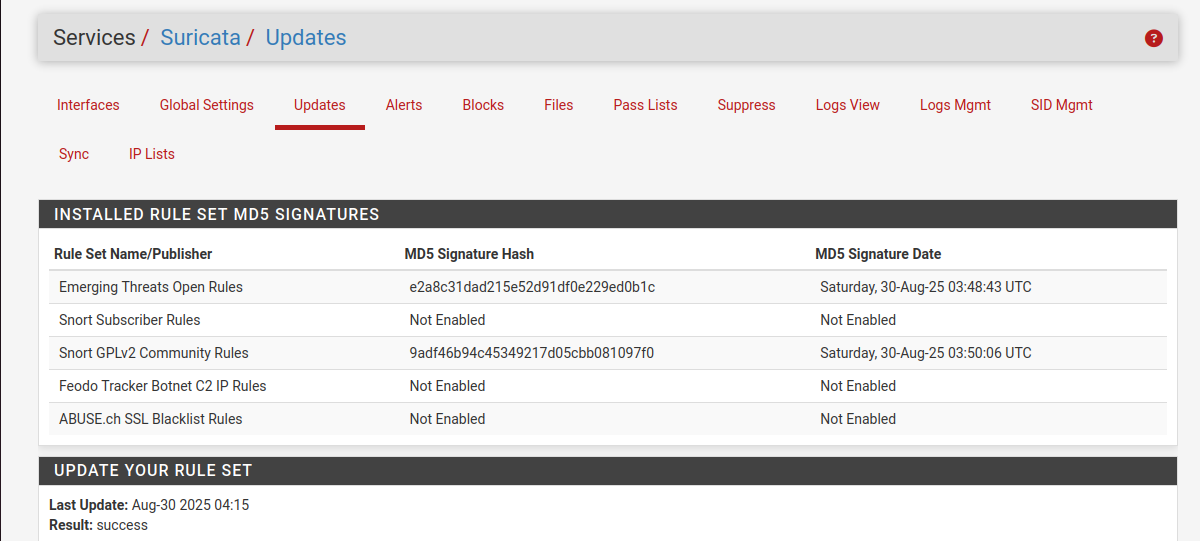
Step 6: Suricata IDS/IPS on WAN
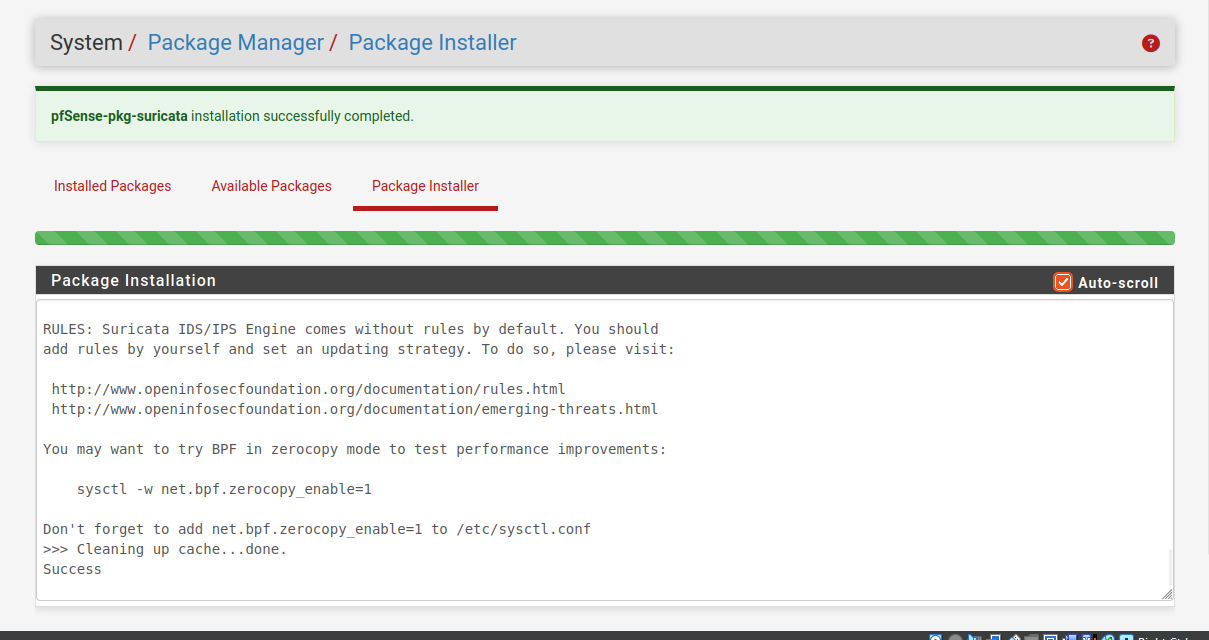
Adding Suricata transforms PfSense into a next-generation firewall. By running in Inline IPS mode, Suricata can detect and block malicious packets on the WAN. With rulesets like Emerging Threats Open and Snort, it can identify malware callbacks, scans, and exploit attempts. Logging DNS, HTTP, and TLS traffic gives analysts deep visibility into network behavior. This step ensures confidentiality (blocks data exfiltration), availability (drops abuse traffic), and integrity (validates traffic). Without IDS/IPS, pfSense would only provide basic policy control.
Framework Mapping:
- CIA: Confidentiality, Integrity, Availability
- NIST: SI-4 (System Monitoring), SC-7 (Boundary Protection)
- ISO 27001: A.12.4.1 (Event Logging), A.13.1.1 (Network Security)
- MITRE ATT&CK: T1190 (Exploitation of Public-Facing Apps), T1059 (Command and Control)
Step 7: Generate & Verify Alerts
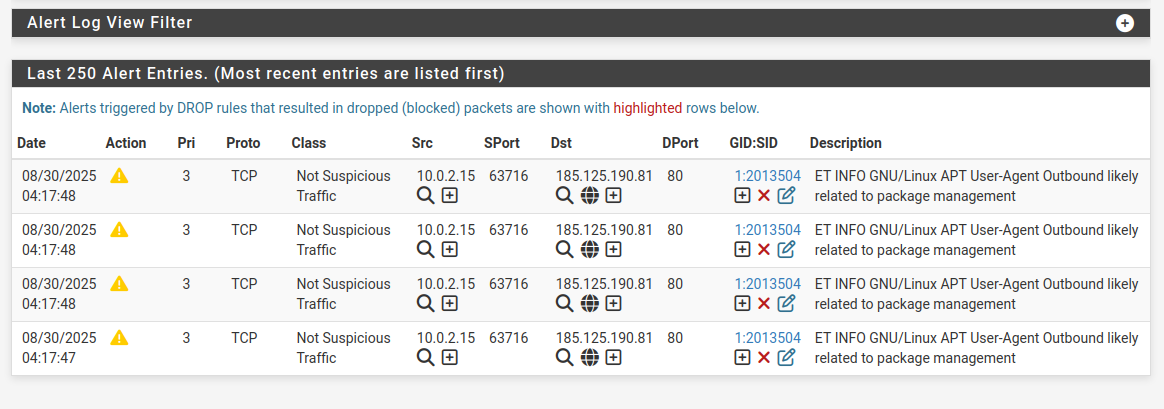
Finally, we test Suricata by simulating both benign and malicious activity. Running curl http://testmyids.com triggers a policy violation alert, while an nmap -sS scan produces a scan detection event. Even normal activities like Linux APT updates generate informational alerts, proving Suricata is watching everything. These alerts confirm that Suricata is working as both a detection and prevention system. In a real SOC, these logs would feed into SIEM tools for correlation and incident response. By generating alerts.
Framework Mapping:
- CIA: Confidentiality, Integrity, Availability
- NIST: AU-6 (Audit Review, Analysis, and Reporting), IR-4 (Incident Handling)
- ISO 27001: A.12.4.3 (Administrator and Operator Logs)
- MITRE ATT&CK: T1046 (Network Service Scanning), T1071 (Application Layer Protocol)
Conclusion
In this lab we demonstrated how to transform pfSense into a hardened firewall and intrusion prevention platform. By layering rules, DNSSEC, secure management, and Suricata IPS, we built a network that balances all three parts of the CIA triad.
Framework Mapping:
- CIA: All three balanced
- NIST: SC-7, SI-4, AU-6
- ISO 27001: A.12.4, A.13.1, A.9.4
- MITRE ATT&CK: Multiple TTP coverage across reconnaissance, execution, and C2